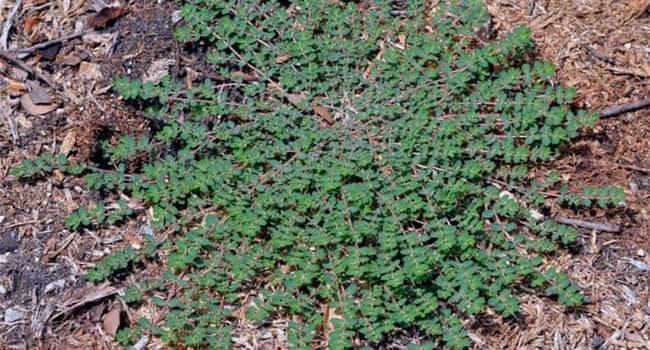
Spurge can be a frustrating and persistent weed, but with the right approach, you can effectively remove it and restore your lawn’s health. Whether you’re dealing with a small patch or a severe infestation, choose the best methods for spurge removal, ranging from non-chemical to chemical treatments, and offer post-treatment recovery tips to ensure your lawn bounces back stronger than ever.
This blog will guide you through effectively eliminating spurge.
✅ Quick Answer
An effective control option is spot-treating spurge plants with Celsius WG.
Tailored Treatment Plans for Spurge Weed Infestation Levels
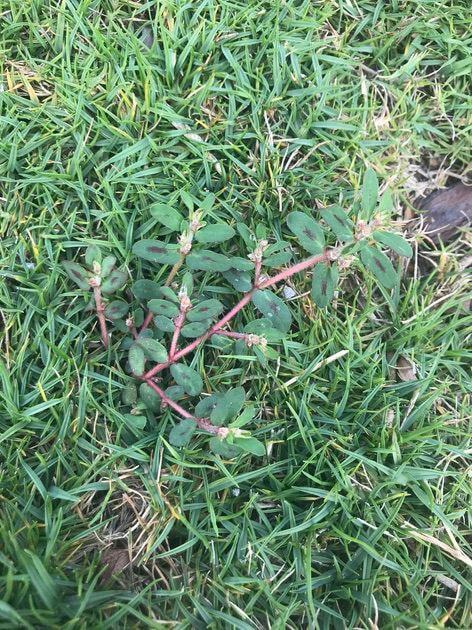
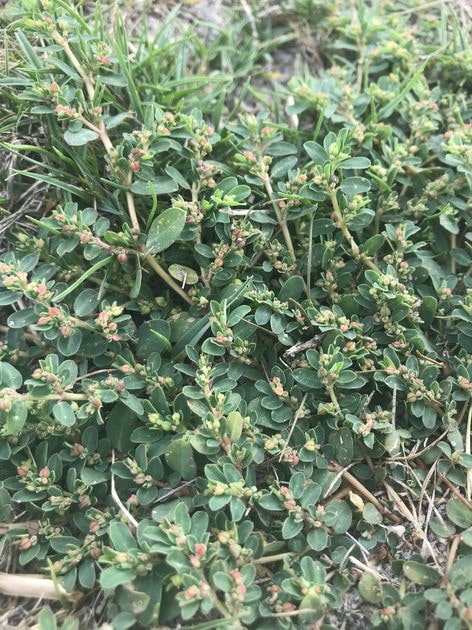
Small Spurge Infestations
For small spurge outbreaks, hand-pulling is the most effective method. Hand-pulling is ideal for isolated patches or areas with minimal weed presence and works well for controlling small infestations without the need for additional treatments.
Wearing gloves is recommended due to the irritating milky sap spurge releases when pulled. Ensure you remove the entire root to prevent regrowth, especially when the weed is young.
Maintain a healthy lawn by mowing at the recommended height for your grass type, watering deeply but infrequently and fertilizing according to soil test results. Healthy turf will naturally crowd out weeds like spurge.
Moderate Spurge Infestations
For moderate spurge infestations, stronger measures are needed.
Begin by treating the weeds with natural solutions like boiling water or vinegar, which can kill the plants without harming the environment. You can also sprinkle rock salt directly onto the weeds, though be mindful of nearby grass as salt can damage surrounding vegetation.
In areas with persistent spurge growth, covering the affected spots with mulch can block sunlight and help smother the weed. These natural methods work well for areas where chemicals aren’t desired but a more aggressive approach is necessary.
Severe Infestations
In cases of severe spurge infestation, a chemical approach combined with preventative measures is most effective. Use a post-emergent herbicide like Celsius WG to kill existing spurge plants.
It’s recommended to wait until you’ve mowed new grass at least 3–4 times before applying any herbicides or other control products. This waiting period allows the new grass to establish roots and reduces the risk of stress from chemical applications.
Follow up by applying a pre-emergent herbicide, such as Prodiamine, to prevent new spurge seeds from germinating so this problem doesn't occur again. These weed control products should be applied when soil temperatures are between 55–85°F for optimal control.
Pair these treatments with cultural practices like regular mowing, fertilization and proper irrigation to strengthen your lawn and prevent future weed outbreaks.
Optimal Timing for Spurge Weed Control
Post-Emergent Spurge Control
Post-emergents work best when spurge is actively growing. Apply during warmer weather (soil temperatures between 60–85°F) and ensure you follow label directions to avoid damaging your lawn. Timing is essential—catching spurge early in its lifecycle will prevent seed production and reduce the chance of future infestations.
Pre-Emergent Spurge Prevention
These should be applied in early spring before spurge seeds germinate to keep severe infestations from occurring again. The key is to apply when soil temperatures are around 55–60°F to stop the weed from emerging.
Post-Treatment Lawn Recovery Tips
After using chemical treatments or manual removal, your lawn may need some attention to recover from bare spots left behind by spurge.
Overseed or Use Grass Plugs to Fill Bare Patches
After removing spurge, it’s important to fill in the affected areas to prevent new weed seeds from taking hold. You can overseed these spots to help your grass grow thick and help crowd out future weed growth.
Alternatively, for larger thin areas, consider using grass plugs to quickly establish coverage. Grass plugs can effectively fill in bare patches, encouraging healthy turf that blocks weeds from returning.
Note: For most weed control products, it's advisable to wait at least 2–4 weeks before seeding or planting grass plugs
Make Soil Amendments
Use a soil test to determine nutrient deficiencies, and apply amendments like lime or sulfur to adjust pH levels. Healthy soil promotes dense grass growth, which helps keep weeds at bay.
Fertilize for Strength
A balanced fertilizer, like Lawnifi, will provide the nutrients your lawn needs to recover and thrive.
Common Spurge Removal Mistakes to Avoid
Incorrect Weed Control Application
Applying weed control at the wrong time or in the wrong conditions (e.g., during heavy rain or extreme heat) can reduce their effectiveness and even damage your lawn. Always follow product instructions closely.
Neglecting Lawn Care
Weak lawns are more susceptible to spurge infestations. Skipping regular maintenance, such as mowing, aeration or fertilization, creates an inviting environment for weeds.
Using the Wrong Product
Cheaper herbicides may seem appealing, but they’re not always the most effective. Choose a high-quality product designed specifically for your grass type and weed problem.
Spurge Removal Frequently Asked Questions
It’s possible, but you need to be very thorough to remove the entire root. Be cautious, as pulling spurge at this stage may spread seeds, leading to future problems.
Typically, you’ll start to see results within 1 to 2 weeks after applying a post-emergent herbicide. The spurge will begin to wither and die, but timing can vary depending on the product used and weather conditions. Follow the label instructions for best results.
Persistent spurge infestations often indicate an underlying lawn health issue. Conduct a soil test, improve cultural practices and use pre-emergents annually to prevent new infestations.